Everything You Need to Know About the Screen Printing Process
Screen printing, also known as silk screening, is a popular printing technique used to transfer designs onto various surfaces, especially fabrics like t-shirts, tote bags, and hoodies. Its vibrant colours, durability, and versatility make it a go-to method in the fashion, merchandising, and advertising industries.
But screen printing isn’t just about pushing ink through a mesh—it’s a carefully orchestrated, step-by-step process that involves precision, patience, and a deep understanding of materials and techniques. Each stage, from preparing the screen to curing the final print, plays a crucial role in achieving a crisp, vibrant, and durable result.
Let’s dive into the complete guide on screen printing process you should know.
Step-by-Step Screen Printing Process to Know
1. Design Creation
The screen-printing journey begins with a well-thought-out design. This initial step is crucial because the quality and clarity of the final print are directly influenced by how the design is prepared. Whether you’re printing a logo, slogan, graphic artwork, or a detailed illustration, precision in this phase sets the tone for the rest of the process.
The design you want to print must be created using graphic design software like Adobe Illustrator or CorelDRAW. It’s essential to ensure the artwork is high-resolution and ready for a single-colour or multi-colour screen printing process.
Once finalised, the design is printed onto a transparent film, also known as a film positive. This transparency will serve as a stencil in the screen preparation stage, allowing the ink to pass through the screen only in the desired areas.
Tip: Keep your design simple, especially for beginners. Bold lines and minimal colours tend to work best.
2. Preparing the Screen
To start, choose a polyester mesh screen and thoroughly clean and degrease it to remove any dust or oils that may affect the print quality.
Apply a light-sensitive emulsion evenly on both sides of the screen using a scoop coater. Once coated, place the screen in a dark, dust-free space to dry completely. This prevents unwanted exposure and helps the emulsion cure properly.
3. Exposing the Screen
After your screen is dry and coated with emulsion, place the transparency film with your design onto the screen. Expose the screen to a strong light source like a UV exposure unit or sunlight. The light will harden the emulsion except where the design blocks it.
After exposure, rinse the screen with water. The unexposed emulsion will wash away, leaving a clear stencil of your design. Inspect the screen for clarity, and once satisfied, let it dry completely before moving on to printing.
4. Setting Up the Screen for Printing
Once your screen is dry and your design is exposed, it’s time to set up screen printing and process it for printing. Position the screen on a flat, stable surface and secure it onto the printing press or printing table. Align it carefully to ensure the design will print in the desired location.
Carefully align the screen so your design prints exactly where you want it on the fabric or item. Use registration marks, if necessary, to guide placement. Double-check that the screen is tightly secured to avoid shifting during printing, which can cause smudging or misalignment.
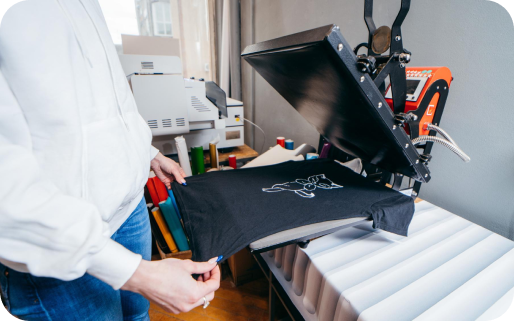
5. Printing the Design
With everything in place, it’s time to bring your design to life. Position your fabric or item beneath the screen. Apply a line of ink at the top of the screen and use a squeegee to pull the ink across the screen in a smooth, even stroke. This pushes the ink through the open areas of your stencil and onto the surface below.
For vibrant results, you may need to make multiple passes with the squeegee. Once done, carefully lift the screen to reveal your printed design.
Tip: Use consistent pressure for clean, crisp prints.
6. Curing the Print
After printing, the ink needs to be cured to ensure it sets properly and becomes durable. Curing involves applying heat to the printed fabric, which helps the ink bond permanently and prevents it from washing out or fading over time.
You can cure prints using a heat press, conveyor dryer, or even a heat gun for small batches. Depending on the ink type, the required curing temperature varies:
Plastisol Inks: Cure at around 300–330°F (143–166°C)
Water-Based Inks: Require 300–360°F (149–177°C)
Low-Cure Plastisol Inks: Set at lower temperatures, such as 260°F (127°C)
Always follow the ink manufacturer’s recommendations to get long-lasting results.
7. Cleaning Up and Reclaiming the Screen
Once your prints are complete and cured, it’s time to clean up. Start by removing any leftover ink from the screen using a spatula or scoop, and store it back in its container for future use. Immediately rinse the screen with water to prevent the ink from drying and clogging the mesh.
If you plan to reuse the screen for a new design, you’ll need to reclaim it. This involves applying an emulsion remover to break down the stencil, scrubbing the screen, and rinsing it thoroughly until the mesh is completely clean and clear.
Get Your Designs Noticed with Screen Printing
Screen printing is a rewarding and creative process that combines precision, technique, and artistry. When choosing screen printing services, it’s important to look for experience, quality materials, and attention to detail for long-lasting prints.
Whether you’re printing custom t-shirts, tote bags, or posters, mastering a step-by-step screen printing guide allows you to bring your ideas to life in bold, vibrant colours. At Al Haram Printing House W.L.L., we believe that with the right tools and a little practice, anyone can bring their vision to life through screen printing.
Ready to turn your designs into wearable art? Let the printing begin.